¶ Configuration through Web Based Management
The configuration of the Gateway Connect is done through a web-based function using a web browser. As with the steps before the process is different for deployment within a self contained network or existing building local area network. Please reference the tab according to your installation type below.
If you are using a FLEXeCHARGE SIM card no configuration is required and you can continue with setting up the infrastructure in the FLEXeCHARGE Platform. For using your own SIM please follow the steps below.
¶ Start of Configuration
Before starting the coinfiguration ensure that you have access to the PIN of the SIM Card and that no Sim Lock is setup. Entering the wrong pin may lock the SIM and require a Super Pin and or PUCK to reactivate.
For configuration of the Gateway you will need:
- A PC with a LAN interface
- A web browser is installed on the PC (e.g. Google Chrome, Mozilla Firefox, Microsoft Internet Explorer).
- The gateway is connected to a power source and the self contained network, for example via a switch (see Gateway_Connect_Installation_Guide
- A free ethernet port on the connected switch
- An ethernet Cable
The following steps will guide you through the setup process of your own SIM.
| Instruction | |
|---|---|
| 1. Connect your PC to a free port of the Switch to which the Gateway is connected | |
| 2. Open a browser on the PC and enter the IP adress 192.168.1.1:3000 in the adress field | |
| 3. In the login window enter "admin" as the username and as the password, and click login. After entering the username and password, the main configuration menu for the Gateway Connect will open. |  |
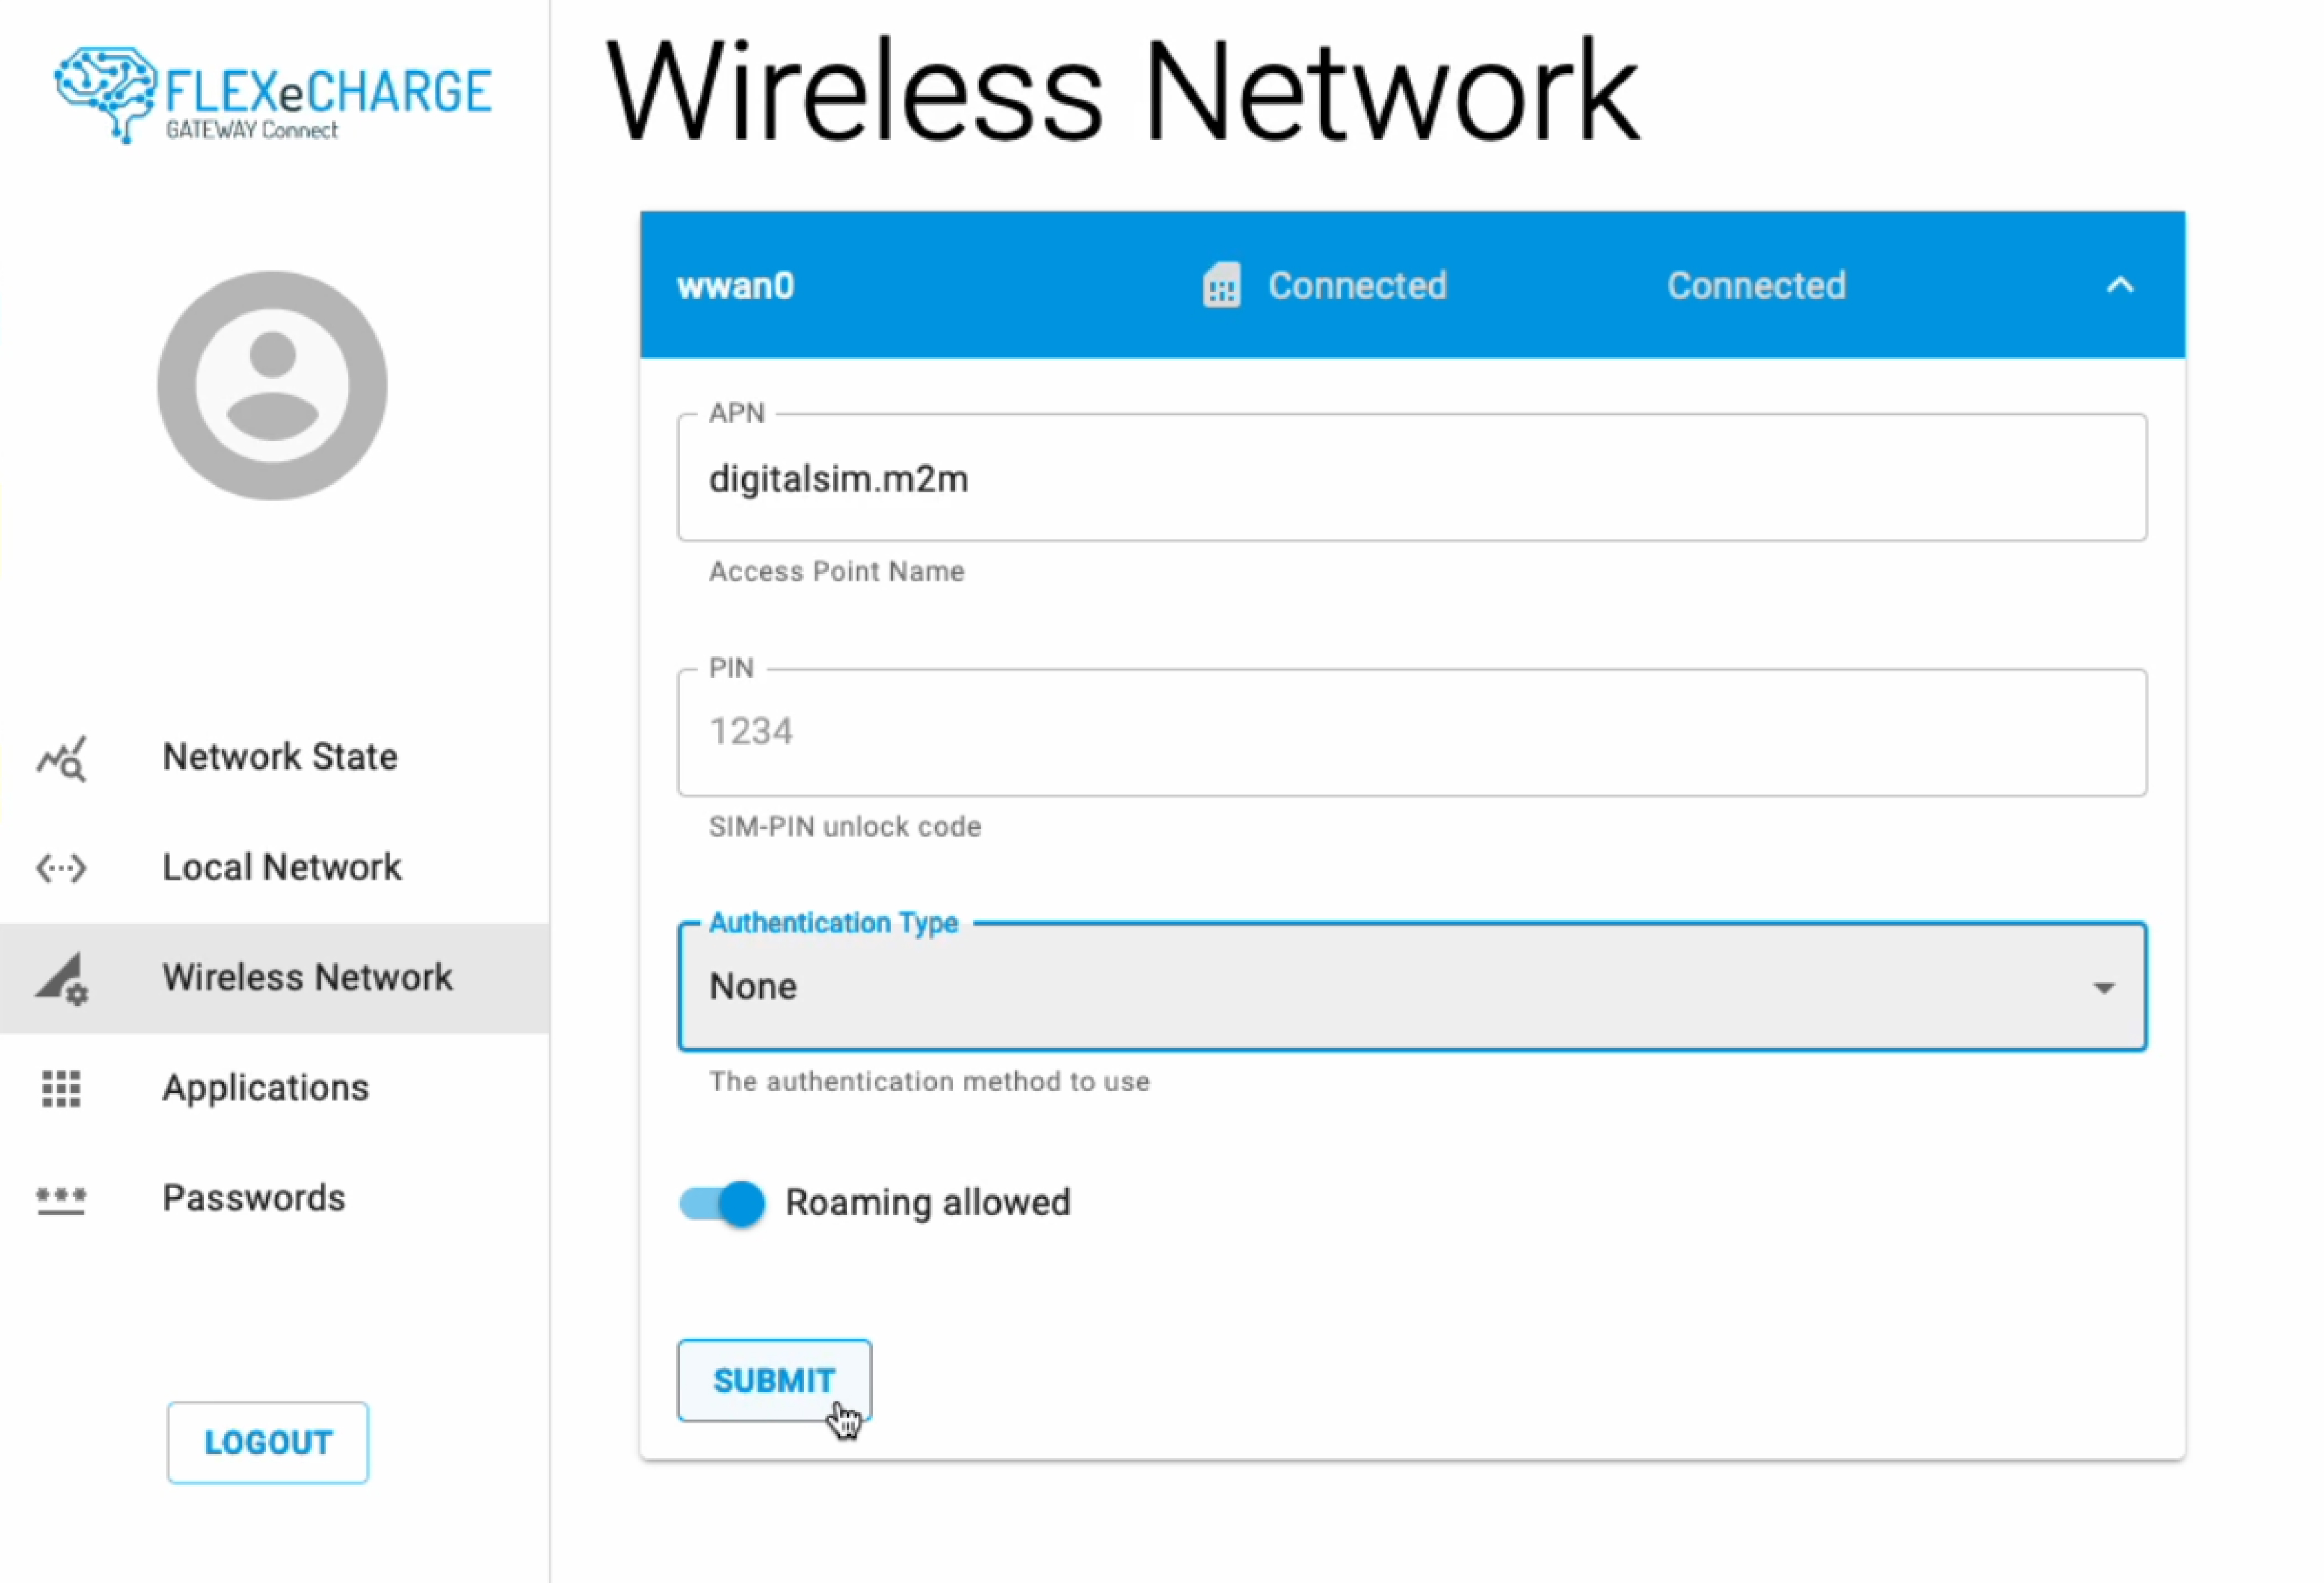
| 4. Open the "Wireless Network" menu. If you have enabled PIN verification for your SIM card, enter the PIN number in the "PIN" field. If PIN verification is disabled, you can leave the field blank. |  |
| If required, enter the APN, username, and password for the authentication of data transmission in your mobile network. You can obtain this information from your mobile service provider. | |
| 5. Confirm your inputs with "SUBMIT" | |
| 6. Reboot the gateway by disconnecting the powersupply, waiting 10 seconds and then reconnecting it and check the network status via the LEDs. In case the gateway does not connect check your inputs again. |
| GSM Status LED | Network Connection |
|---|---|
| Slow blinking (short ON / long OFF) | Searching for network |
| Slow blinking (long ON / short OFF) | Registered, but no data connection |
| Fast blinking (short ON / short OFF) | Registered and active data connection |
The Gateway will now connect to the internet and be accessible through the FLEXeCHARGE Platform where you can setup the infrastructure and change load management policies. Follow this guide to setup the FLEXeCHARGE Platform
🔗 Setup Guide FLEXeCHARGE Platform
The above instructions resemble a quick guide and the Gateway supports a lot of other functionality. Reference the advanced configuration documentation for further information.
¶ Start of Configuration
For configuration of the Gateway you will need:
- A PC with a LAN interface
- A web browser is installed on the PC (e.g. Google Chrome, Mozilla Firefox, Microsoft Internet Explorer).
- The gateway is connected to a power source and the local area network.
- An ethernet Cable
| Instruction | |
|---|---|
| 1. Unplug the ethernet cable connection the gateway to the local network. And connect the Gateway (eth0) directly to the PC using another ethernet cable. | |
| 2. Start the Getaway. Connect the power supply to the connector labeled with `+` and `-`. Make sure to observe the correct polarity. The gateway is equipped with reverse polarity protection, but will remain inactive if the polarity is incorrect. During the initialization phase (about 5 seconds) after turning on the power supply, LED A and LED B will light up, and the Power LED will remain lit. When LED A and LED B have turned off, the device is ready for operation. | |
| 3. Open a browser on your PC and enter the IP address 192.168.1.1:3000 in the address field. |  |
| 4. In the login window enter "admin" as the username and as the password, and click login. After entering the username and password, the main configuration menu for the Gateway Connect will open. | |
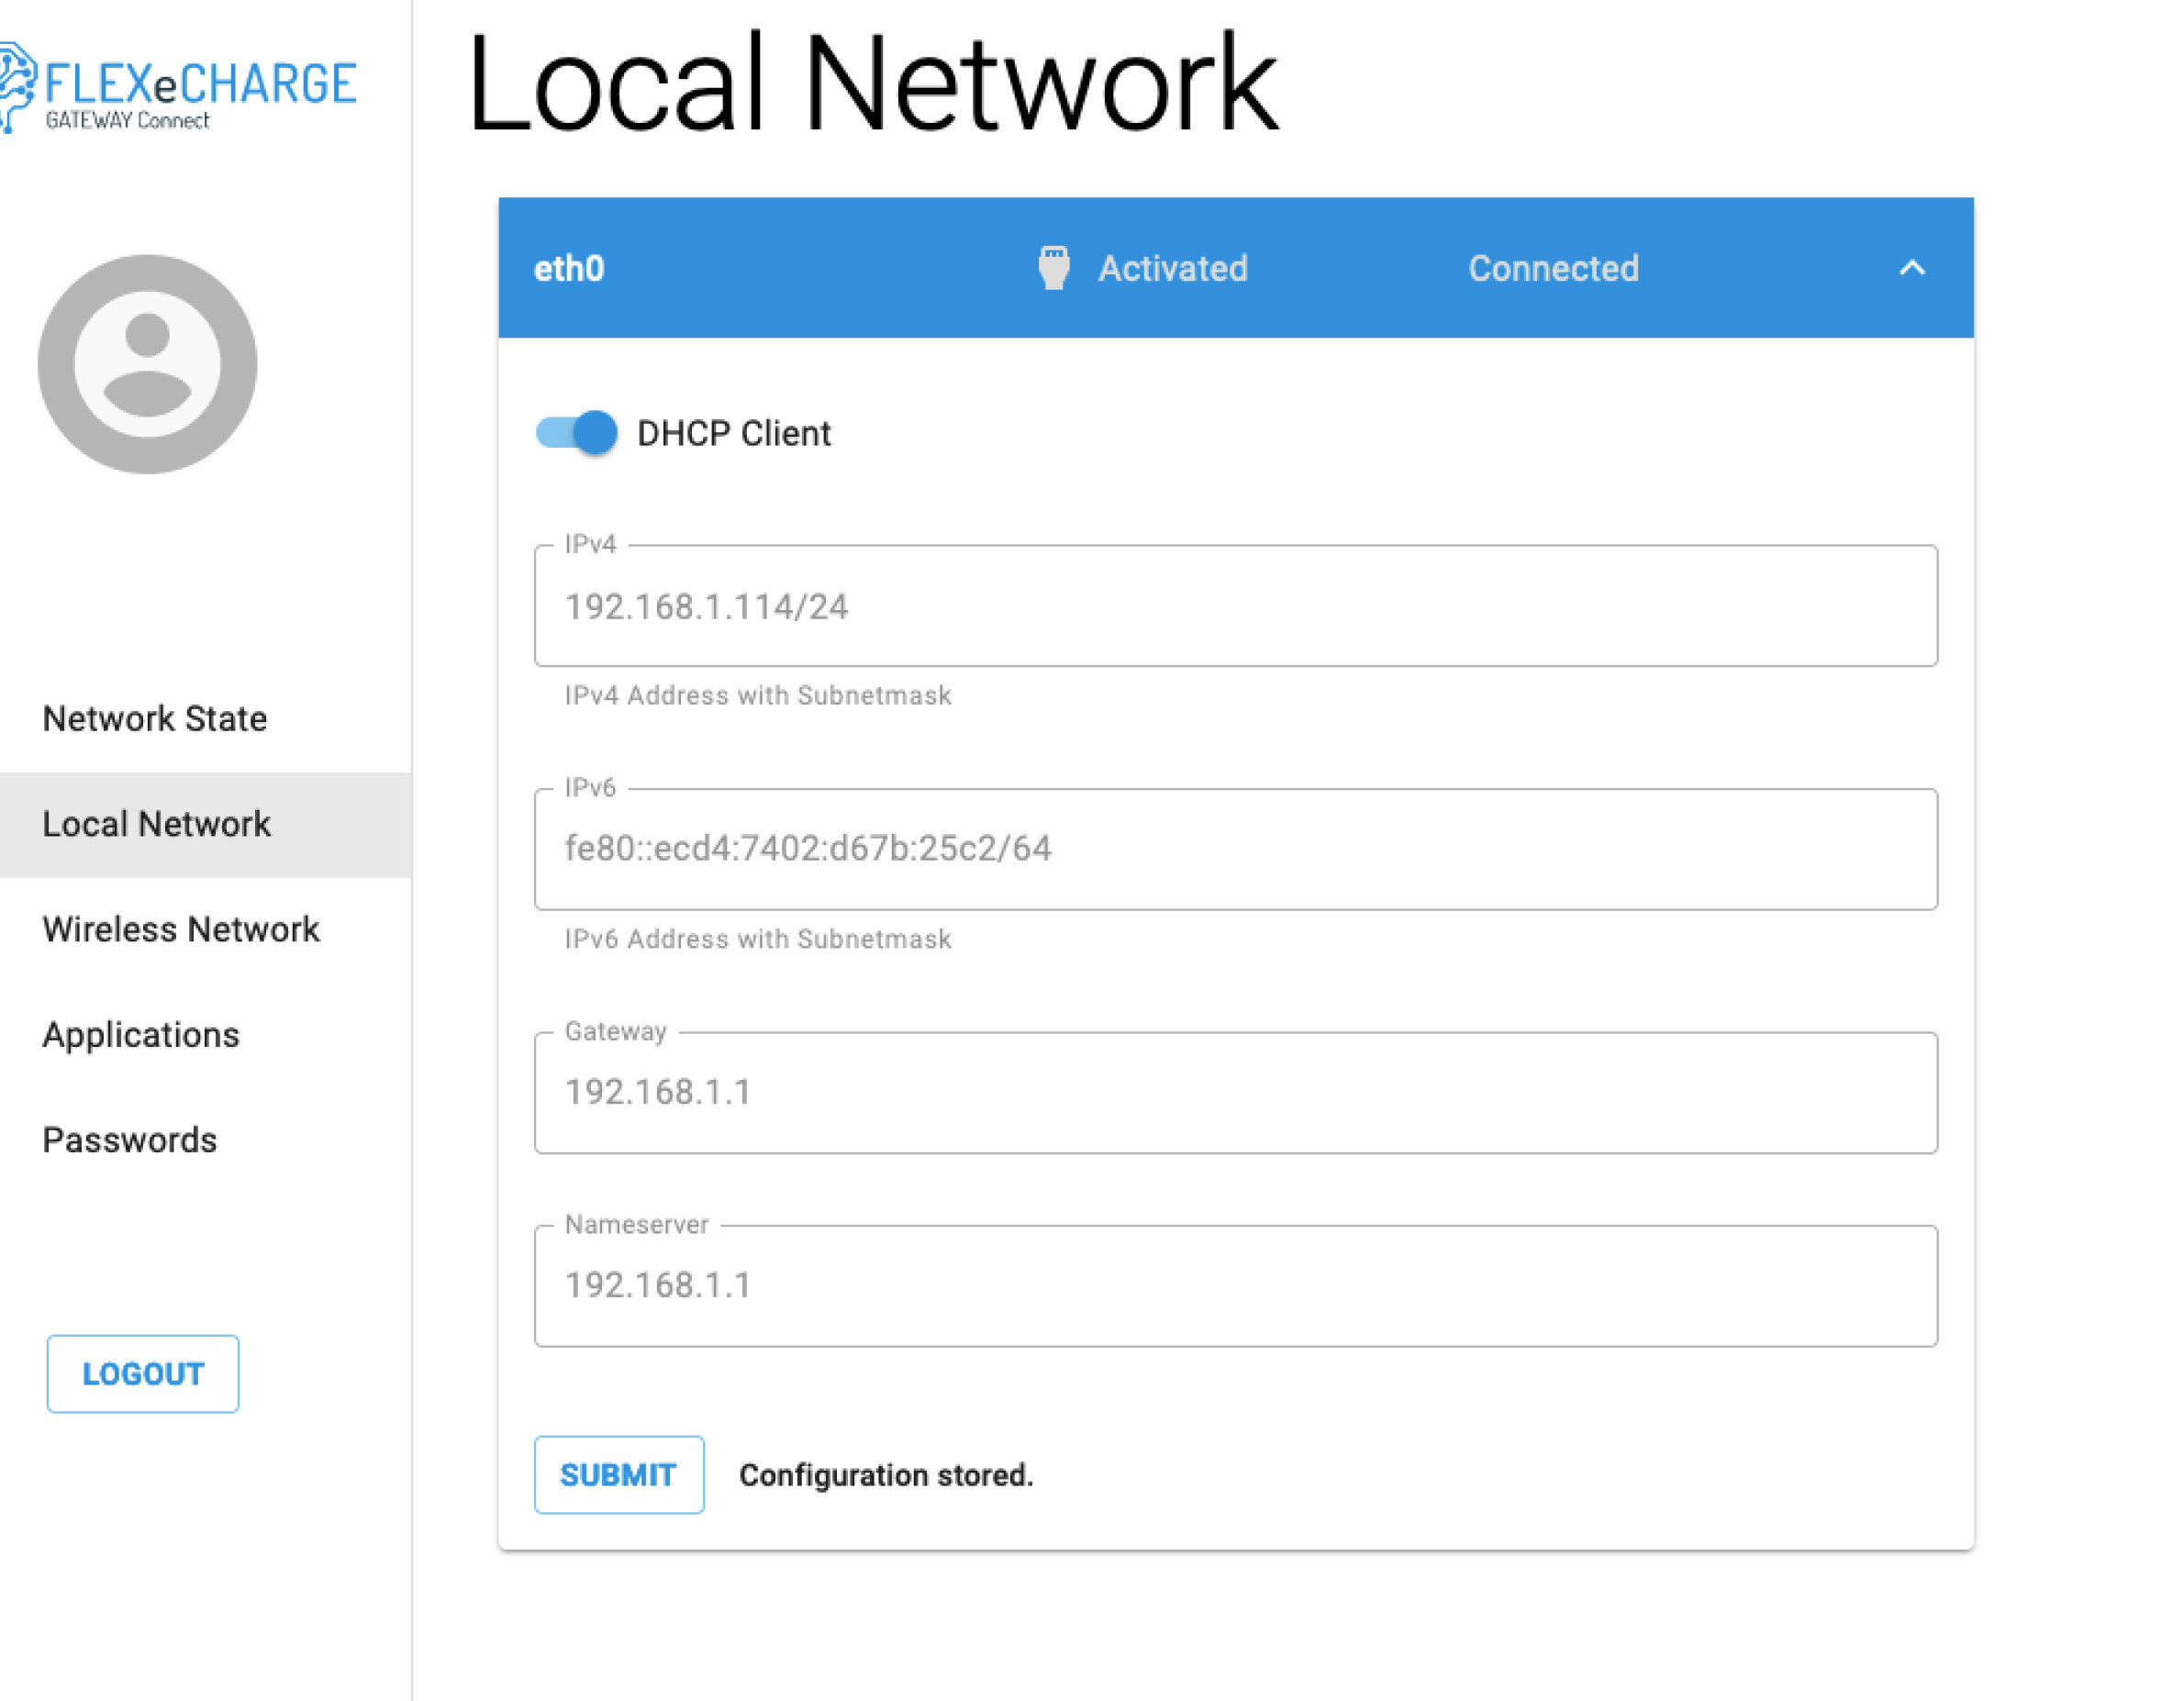
| 5. In the menu ``local network``deactivate the DHCP server option and activate the DHCP client option. This will put the gateway in client mode. |  |
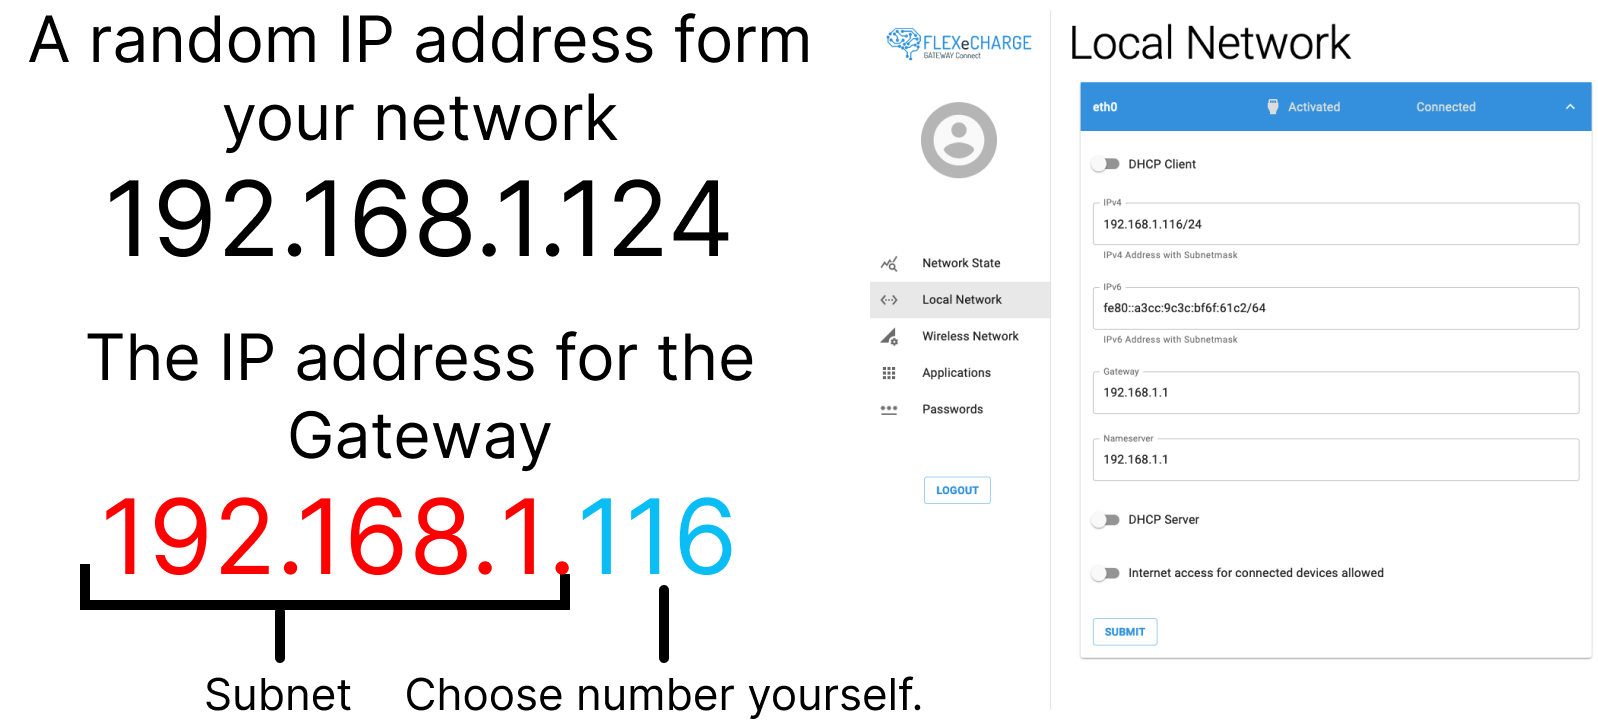
| 6. The Gateway must be given a static IP to function properly. This static IP must match the IP subnet of you local network. In this example ``192.168.1.XXX`` describes the subnet. Anything after the ``.1.``can be chosen freely as long as it does not exist in the network yet. Choose a fitting IP adress and enter it in the IPV4 field. |  |
| 6. Switch the Gateway off by removing power cable. wait 10 seconds Reconnect the Gateway to to the local area network by reconnecting it to the switch and network with the DHCP server. Then reapply power to reboot the Gateway. Check the network status via the LEDs. In case the gateway does not connect check your inputs again. |
| GSM Status LED | Network Connection |
|---|---|
| Slow blinking (short ON / long OFF) | Searching for network |
| Slow blinking (long ON / short OFF) | Registered, but no data connection |
| Fast blinking (short ON / short OFF) | Registered and active data connection |
The Gateway will now connect to the internet and be accessible through the FLEXeCHARGE Platform where you can setup the infrastructure and change load management policies. Follow this guide to setup the FLEXeCHARGE Platform
🔗 Setup Guide FLEXeCHARGE Platform
The above instructions resemble a quick guide and the Gateway supports a lot of other functionality. Reference the advanced configuration documentation for further information.